SERVING FAMILIES ON THE MAINLINE
Adding Mortar to Our Fireplace
The thorn in my side since we very first bought our house was our gigantic fireplace. The fireplace is entirely too large for the room. It is approximately 6’ tall in a room with 8’ ceilings. Most people would love to have a real wood burning fireplace like that, but the size of it complicates the layout of the room.
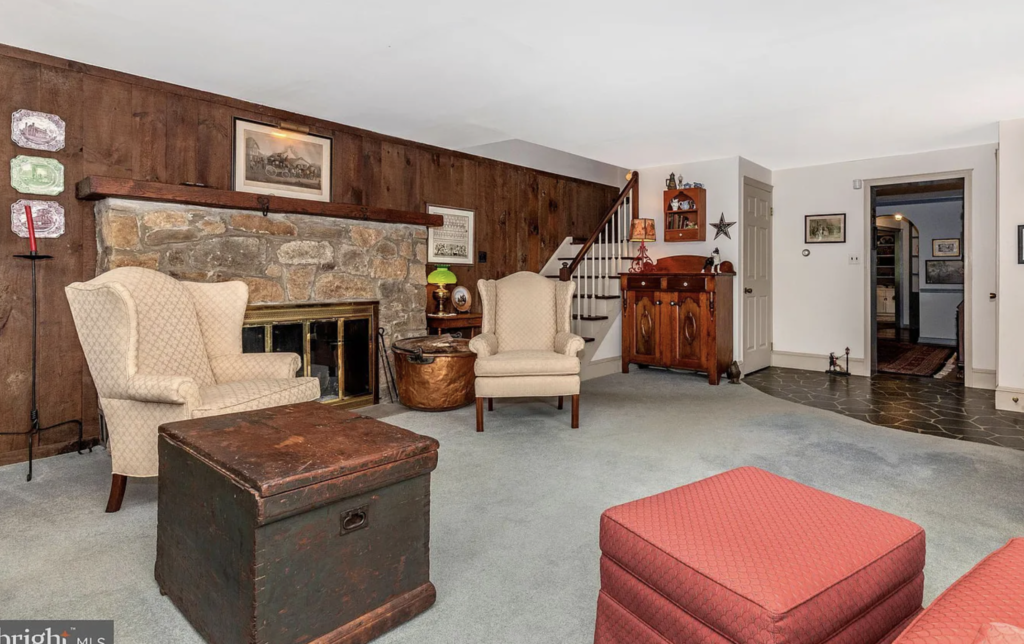
The fireplace is located on the back wall, and the left wall has two windows (which is where we initially put our TV, because the fireplace was too tall to fit the TV above it). The wall directly across from the fireplace has a large bay window, and the remaining side of the room is open, where the staircase runs through. It is a tough space to put a TV and a relaxing area into.
Our solution to the height of the fireplace was to remove the oversized mantle and install a lower mantle. Sweet James was able to achieve this by building a hollow mantle that he was able to drop onto the top of the fireplace. This way, the mantle would still appear thick, but not at height to the top of the fireplace. By doing this, we were able to gain about 4 more inches of space above the fireplace.
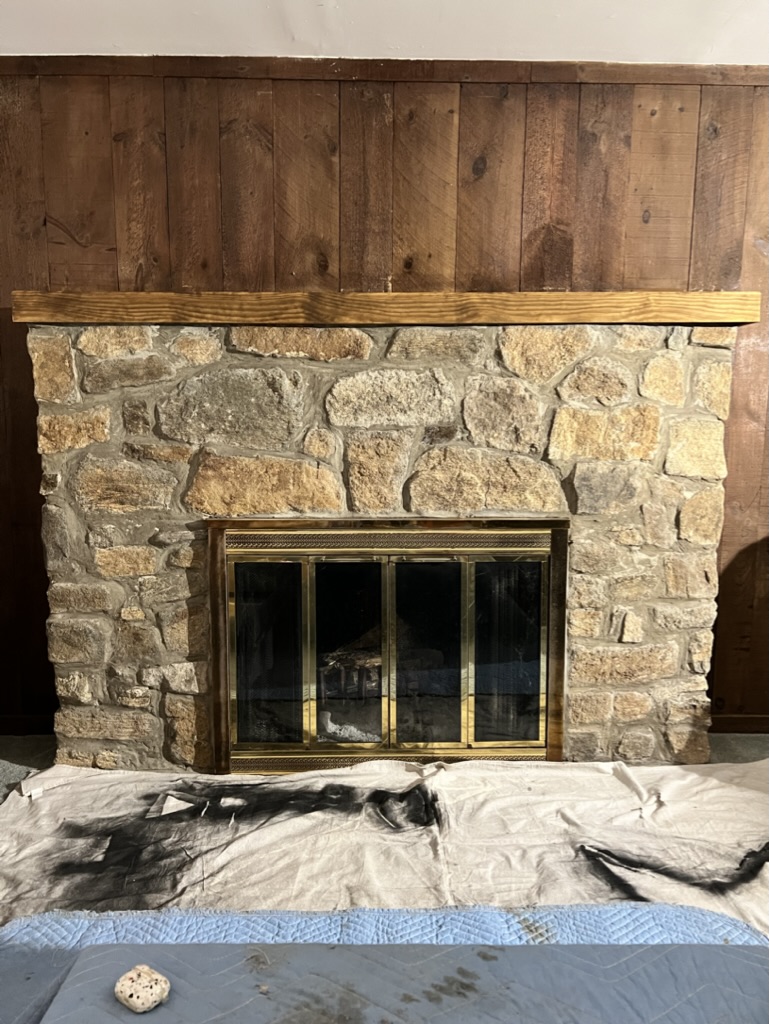
In doing so, I became motivated to execute a project on the fireplace that I have had my eye on since we bought the house. Shortly after we bought the house, I had come across Chris Loves Julia’s blog post about their stone fireplace that they over grouted and transformed. I bookmarked that blog post over two years ago and have been waiting to do it ever since. Find that post here.
Sweet James and I took Julia’s shopping list to Home Depot, bought everything we needed, and eagerly ran home to set everything up and get started. As always, I was chomping at the bit. In typical Sweet James fashion, he had set up the family room with drop cloths and tarps, buckets for the mortar, buckets for cleaning, tools, sponges and rags. We were ready to go!
Everything started out great, we had loaded the piping bag with mortar, I was piping the mortar onto the fireplace and everything was running smooth. The only problem was, I felt the mortar was too thin and I was having a hard time getting it to stick. So, the next batch we mixed thicker. The problem with the thicker batch, was that it was really hard to squeeze out and it was still falling off. My forearms were throbbing and so were my fingers. Honestly, if I wasn’t a CrossFitter, I wouldn’t have been able to do this.
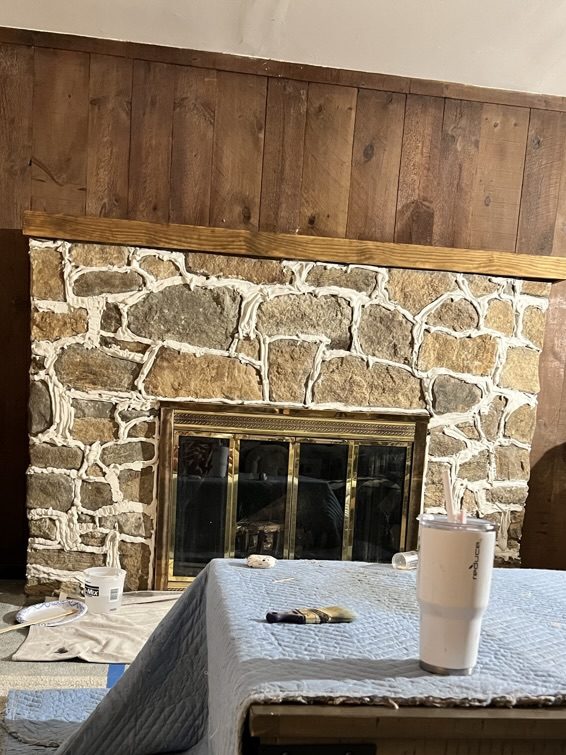
This process was taking so much longer than I had anticipated. It took nearly two hours to get all of the mortar onto the fireplace, and it was not looking beautiful. By the end, my hands were covered in mortar and so were Sweet James’. We are “hands” people, and so working with tools always ends this way for us. We just cant resist getting our hands involved. It feels like we have more control this way – but it always makes a larger mess.
My technique began to deviate from Julia’s on the second half of the piping portion of the project. I was having such a hard time getting the mortar to stick and it was more because of the orientation of the stone on our fireplace than anything (from pictures, it seemed like Chris and Julie’s fireplace had deeper crevices between their stone, whereas ours were very large, thick, and shallow). I started noticing that the mortar was sticking better to areas that already had mortar on them. So, I started taking little bits of mortar and rubbing it onto the naked areas and then piping the mortar on top of that, and the project started moving much quicker. I also opted to keep the mortar thinner rather than thicker so I didn’t have to pull a muscle to finish the job.
After the mortar is piped, there is a setting time, so using thinner mortar just meant we had to let the mortar sit for longer. Once the mortar was ready to press out, we 86ed the idea of using shim or a flat surface because no matter what we did, the mortar kept sticking to the instruments. This likely meant that the mortar hadn’t set for enough time, but at this point it was getting late and we needed to finish this project.
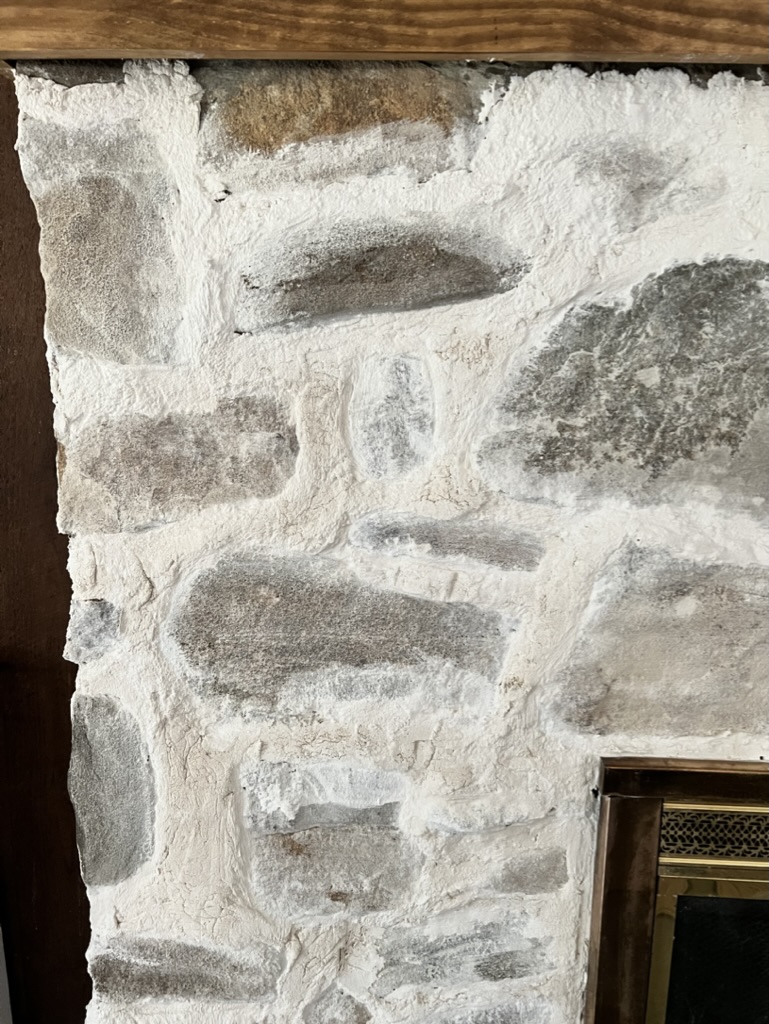
This is where we pivoted to get the project done faster. The final step in the project is using a firm brush dipped in warm water to brush and blend the mortar out and onto the stone. As I was doing this, the mortar was spreading more than I wanted it too and brushing onto the stone, causing it to have a cloudy white cast over it. But, I was really starting to like that look. So, I used the brush dipped in warm water to blend out all of the grout lines rather than pressing them flat, and this was my finished product.
The lesson here is that Chris and Julia are much more seasoned DIYers than myself and Sweet James, and they have a better handle on what they are getting themselves into before they start. I thought it would be fun to share my attempt and how my technique adjusted during the project to reveal something that was different than what I was going for, but that I am still proud of and happy with.
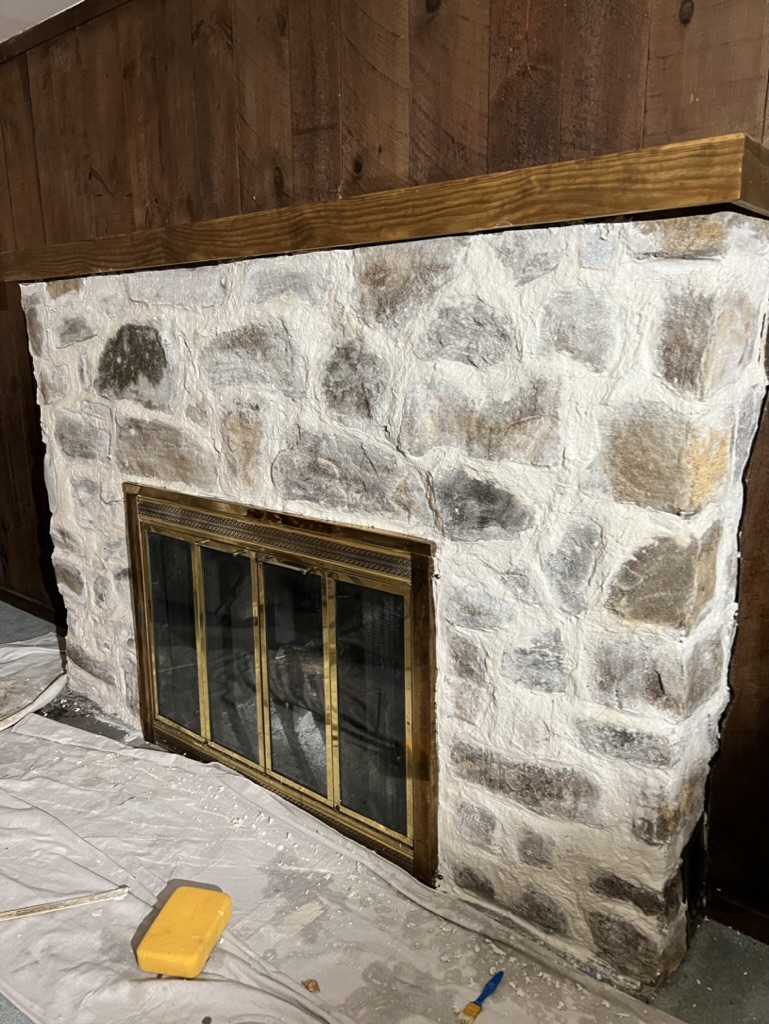
This project only makes the beginning of our fireplace renovation. We still have a lot of work to do, but it’s going to be a wild transformation – one you WON’T want to miss!
Leave a Reply Cancel reply
design diary
contact
home
portfolio
©2025 little green house interior co | site credit Karima Creative | copy credit black diamond copy co
Looks fantastic! Your bravery paid off!